Well, it may not seem like a lot to other blog writers but over 4000 people have viewed my blog. Thanks everyone!
I have now put my Cupid model onto eBay. Hopefully it will find a good home.Take a look if you fancy a bid! :)
The Christmas model continues. I have made the frame, a bed and am working on the worm drive. Pics soon.
Thursday, 10 October 2013
Thursday, 26 September 2013
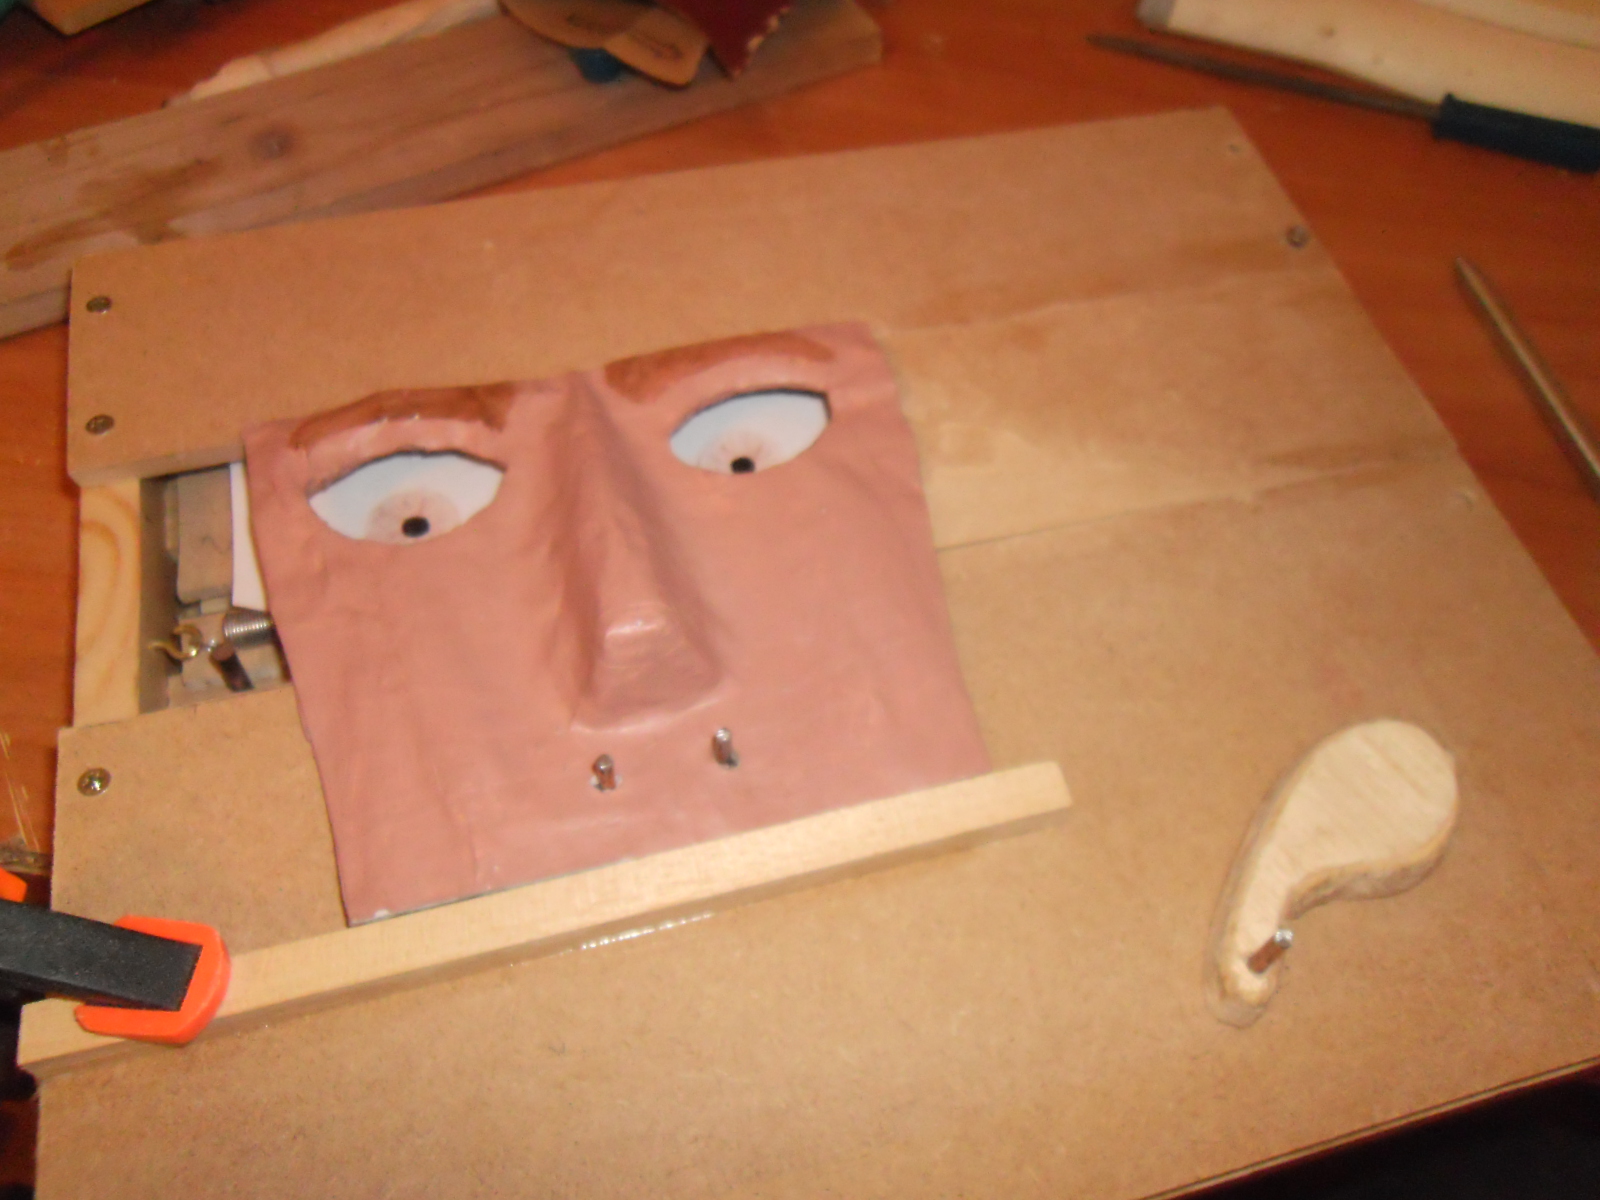
7 months too late for Valentine's day (or is it 5 months too early?)
Well, it's finished and I'm happy with the way it has turned out. The mechanism took me a long time to figure out (as always) but it was valuable experience.
Onto the next one! :)
Onto the next one! :)
Friday, 20 September 2013
A few pics and stuff
Well, a day late but here are some pics and some video.
First, here is the video of the old mechanism and the way it was working (not very well):
The wheel on the left was meant to move an escapement thing which would stop the friction slave wheel and hold it in position, until the escapement let it pass again. I couldn't quite get the timing right.
Here is the new mechanism.
I've gone back to the worm drive as I can handle them quite well now but there is a slight dwell in the movement meaning the movement is quite jerky. I made 2 sets of snail cams but the first set made the movement too slow, so I made a new one to speed things up. The first one wasn't as jerky though. Hmmm. But, it does work and it stops the mechanism precisely where I want it. Now to fit the snail cams and see if they work.
Definite inspiration from Paul Spooner and his mechanisms. Thanks Paul!
Here are more pics:


I like the new design. It looks a lot cleaner. Hopefully I'll have it finished by next week. Not a good time of year to sell a Valentine's themed model though :)
Wednesday, 18 September 2013
Well what d'you know?
I've cracked the mechanism for my valentine's model! It's a bit slow so I need to make a faster gearing system but it actually works!
Inspiration for this goes to Paul Spooner who gave me an idea for an escapement mechanism. Pics to follow tomorrow.
I now have to wait until February to try and sell it though.
:)
Sorry for the long gap between posts. Now that I've got the hard part of this model out of the way, I can hopefully finish it soon and start on my Christmas model.
Saturday, 27 July 2013
Oldies
Just trying to clean up some files on my computer when I came across these video files of old models. Enjoy!
UPDATE: and more I found
I've actually made quite a few models now. Hadn't really thought about it...
Mind you, not all of them were good ;)
UPDATE: and more I found
I've actually made quite a few models now. Hadn't really thought about it...
Mind you, not all of them were good ;)
Wednesday, 24 July 2013
Defeat!
I know, I know...I've been rubbish. No post for ages and not a lot to show for it.
The problem is, I'm not enjoying this model.
It's interesting and there are a lot of challenges, but that's part of the problem I've found. All my other models have been relatively small and this means it is easier in a sense to create parts. When you go big, previous small mistakes which you could get away with, now become even bigger and there a smaller tolerances for any errors. Every time I look at the model it seems that with every piece I make there are more and more things acting against each other which interrupt the intended operation of the piece.
Plus I find myself getting bored with longer projects.
Yep, I'm gonna admit defeat with this one. I'm gonna pack it up in case I come back to it at a later point. I'll still have the motor for another project if I want to use it.


If I were to do a post-mortem, I would have to say that I'm trying to run before I can walk and I really need to develop my skills as well as accurate measuring. I also think my tool skills are not quite there yet, especially in terms of making holes. It might be that my drill press is inaccurate which is causing deeper holes to go off the intended 90 degree cuts. I would need to invest in a better drill press.
I'll practice with smaller models first. I still need to finish my valentines model as well as think about another Christmas model. If I start now, I should hopefully have enough time, but I'm being quite lazy at the moment. That's probably another thing I need to work on.
*sigh*
Big thanks to J E Johnston who directed me to his blog with instructions on making a geneva wheel (Maths! ARRRGHHH!!!). See below for the link:
http://newgottland.com/2012/01/08/make-geneva-wheels-of-any-size/
Also to Dug North who gave me the idea of using a geneva wheel in the first place (I could have hit myself for not thinking to use one! Sometimes I overthink things and I cannot see the easiest solutions. Thanks Dug!)
Sunday, 12 May 2013
Cube update 2
Work progresses slowly, with a few problems I've had to overcome but I finally have a (nearly) working drive system. The only problem is has is that sometimes the connection to the first drive belt to the motor sometimes comes loose. I'll fix it (somehow...)
Pictures!
Here is the working mechanism so far. I discovered that if I change the voltage on my dc power adapter, it can also change the speed so I might play around with that. I have decided to control the whole mechanism with the coin slot with an arduino. I have been wanting to explore using an arduino for a while and this will give me the opportunity. A friend of mine uses them a lot and will be giving me a tutorial.
Now I need to work out how to lock the cube at the top of the cycle. This will involve me spending a long time watching the mechanism in motion and working things out.
Pictures!
 |
| This is how I wanted to connect the first drive wheel and it would have hopefully connected to the motor drive which is threaded. Unfortunately, my frame is not allowing the thread to reach out far enough, so I am having to make a connector to join the 2 but this keeps coming loose with the wooden connections. I have ordered a tap & die kit to make a threaded connector, which will hopefully have better strength. |
 |
| The assembled drive and wheel to lift the main cube. The wooden cube i had made was weighing the mechanism down so I decided to make a card cube instead to reduce the load. |
 |
| A close up of the mechanism inside |
Here is the working mechanism so far. I discovered that if I change the voltage on my dc power adapter, it can also change the speed so I might play around with that. I have decided to control the whole mechanism with the coin slot with an arduino. I have been wanting to explore using an arduino for a while and this will give me the opportunity. A friend of mine uses them a lot and will be giving me a tutorial.
Now I need to work out how to lock the cube at the top of the cycle. This will involve me spending a long time watching the mechanism in motion and working things out.
Sunday, 5 May 2013
Cube update 1
I just found out that the charity event for the cube arts centre ends in December, so I figured I'd better get a move on and finish the model. Here's what I have done recently.
So it's coming together, just a little slower than I like, so I need to move it up a gear. More pics to follow soon (hopefully).
 |
| This was a test to check the size of the wheel to lift the rod for the cube and how far the rod raised. I could do with trimming the circumference a little. This is only a rough circle for testing purposes. |
 |
| This was a little jig I made to make sure that all of the pins were the same length. I did it by eye and gently hammered in each pin until I could see it was at the same circumference as the larger paper circle. |
 |
| Here is the Cube with the pin wheels attached. I now needed to make a small pulley to attach to the smaller pin wheel. |
Here is the video of the cube in action, raising and spinning. I now need to find a way to lock it in place when it reaches the top, and then have something lower it down again.
 |
| This is the car windscreen wiper motor I bought. I need to test it to see if it has enough torque to turn the entire mechanism. I have mounted it here and will probably need to add a belt drive to slow the movement down a little. I need to have a belt drive to allow it to reach the other side of the frame where the main rotation will take place. |
 |
| Back view of the motor |
Wednesday, 24 April 2013
The Cube
Hello. Here are some photographs of things I have been doing recently, accompanied by a bit of text describing each photo
 |
| I have been experimenting with mechanisms which can raise a wooden cube, for my first donation box automata thing. A cube has to rise and rotate at the same time and then pause when it reaches the top and then come down again. I first tried a scissor lift design. It had potential but I couldn't work out how to get the cube on top to rotate at the same time. |
 |
| My next idea was to have a block which the cube would sit in (via a brass rod). I purchased Matthias Wandel's gear generator programme (highly recommended) and made a rack and gear to see about ways to raise and lower the block. Imagine this photo rotated 90 degrees clockwise and that the gear is lifting and lowering the piece of wood. |
 |
| The start of my frame to test out the mechanism |

 |
| I made a hole in the top to allow access for the cube. I tried to use Pythagoras' theorem to calculate the size of the hole but I messed this up as I was thinking of the distance between 2 points in a square in 2d. I wasn't thinking about the largest distance between 2 points in 3d cube (silly me). |
 |
| Gluing the cube |
 |
| A cube |
 |
| The cube mounted in it's block. The idea is to have a pin wheel gear sat horizontally underneath the cube and another pin wheel will be mounted to the side of the block with a pulley. The pulley will have a length of cord with a weight attached to it. As the block rises, the weight of the pulley will (hopefully) turn the pin wheels which will allow the cube to rotate. I have a feeling I have made this overly complicated. |
 |
| The block will have some tubes attached which will have guide rods inserted into, which will give the rising block a path to follow (up and down) |
 |
| I settled for this design. The point in the middle of the block allows the rod to slide up and down. This allows it to move the block up and down. I tried it before as a fixed point on the block but it kept on wanting to move in an arc (like a compass). |
Now I need to find a way to move it up and down and make it pause. I am thinking of a large wheel and a lock mechanism but will need to pro-type. I am also thinking about using pulleys but am not sure how to incorporate this.
I am concerned that I am going about this in a really poor way. I'm not sure who reads this blog but if you have any ideas or think that I am going about this the wrong way, please let me know. I don't want to spend too long as I am making it in order to help raise money for an arts centre. The sooner it is completed, the better.
Sunday, 24 March 2013
Bristol Mini Maker Faire
The first Bristol Mini Maker Faire was held yesterday and it went down very well for all involved. The local Bristol Hack Space was pretty cool and I enjoyed the 3d printer they had (I'd love to get one of those. Gears would be so easy!)
I was overwhelmed with kids and their parents trying my models. I had a couple break through overuse. A couple also had trouble due to the heat in the room (no open windows) so the wood expanded in some cases but it was still pretty good. Here are some pics of the models I made. Foolishly I forgot to bring my camera to the event and my phone camera is broken. (sigh)
I gave loads of business cards out so hopefully that might inspire some people to have a look at this blog. I hope people enjoyed the fair.
For now I'm gonna take a few days off and then plan my next model. I think the next one will be for charity. More to follow.
I was overwhelmed with kids and their parents trying my models. I had a couple break through overuse. A couple also had trouble due to the heat in the room (no open windows) so the wood expanded in some cases but it was still pretty good. Here are some pics of the models I made. Foolishly I forgot to bring my camera to the event and my phone camera is broken. (sigh)
 |
| The dog I made. Opens its mouth and wags it's tail. Uses a push rod and swash plate |
 |
| The mechanism push a lever which moves the push rod for the mouth. |
 |
| A model of Isambard Kingdom Brunel, who created a few engineering marvels in Bristol. Seen here are the SS Great Britain and the Clifton suspension Bridge. One little girl asked why I made him so sad. He does look like a bit of an undertaker |
 |
| A simple friction wheel set up with a couple of offset cams moves the head left and right. |
 |
| You can see the gear I used. It moves the wheels veeerrry slowly, a lot of people actually thought it was broken. A lot of effort for very little reward, so not a great success for the audience. A lot of people wanted the bridge and the ship to do something. Maybe I'll re-visit it. |
 |
| My name badge. |
 |
| I had just enough time to make one more model out of some scrap wood I had left. I wanted to use my spiral worm gear. |
 |
| It operates a simple snail cam which pushed a little block with a pair of eyes I drew on it. This was my favourite model of the fair. Mainly because of the spiral gear. |
For now I'm gonna take a few days off and then plan my next model. I think the next one will be for charity. More to follow.
Sunday, 17 March 2013
Moustache previewing machine
This is the present I made for my friend. I foolishly forgot to film it


Here is shameless attempt to ingratiate myself with the maker faire crew. (Nice one!)


Here is the workbench/desk I built

Here are some gears for people to play with at Maker Faire


Here is a dog I have started working on. It'll have a wagging tail and a mouth which opens and closes.


One week to go and 3 more models to make. More pics to follow
Subscribe to:
Posts (Atom)